The Best of the Utah Mighty Five
Disclaimer: This post may contain affiliate links. Please see our Disclosure Policy and Advertiser Disclosure for details.
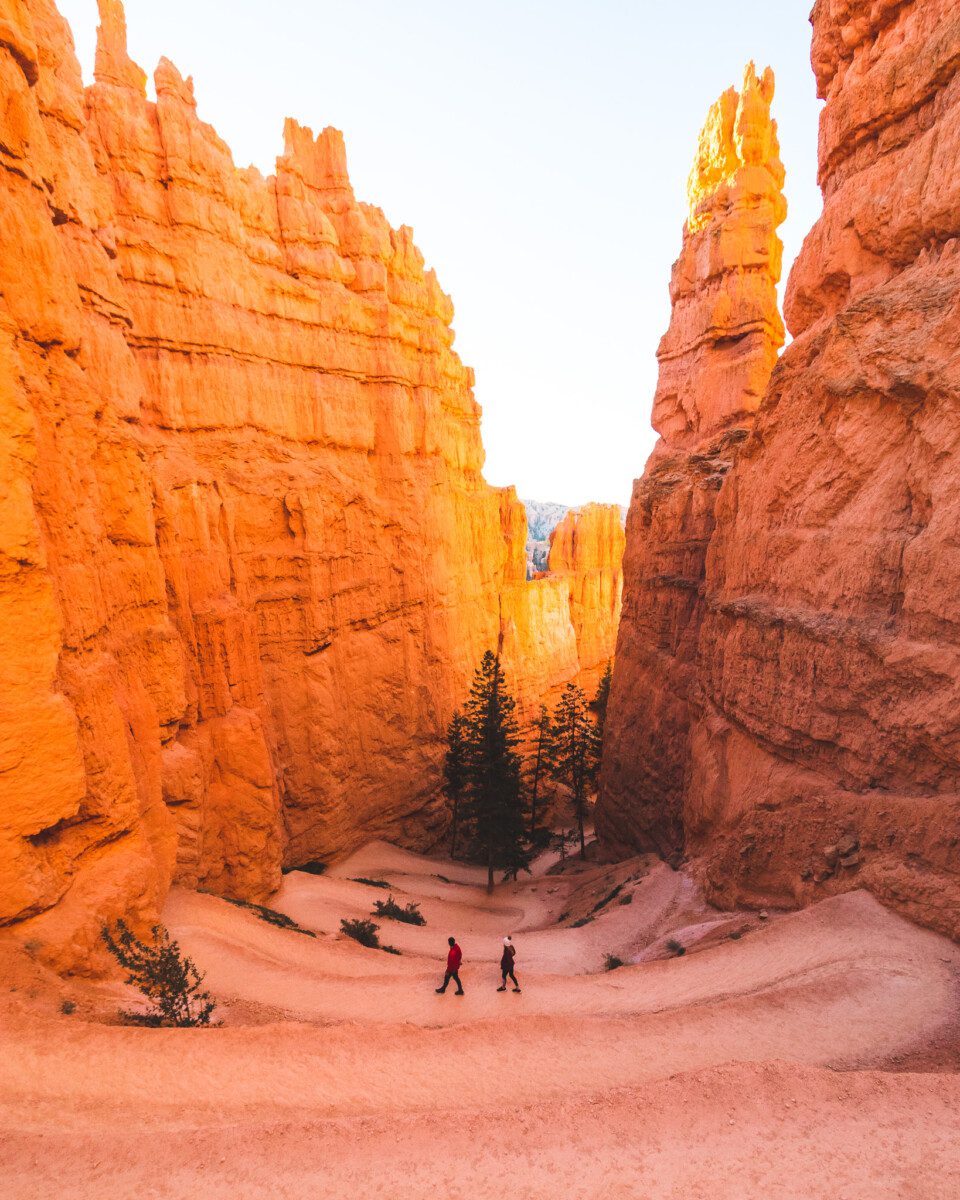
Utah is an amazing state that houses five of the most beautiful U.S. National Parks. Many like to call them the Utah Mighty Five. The geological landscapes are breathtaking and are parks every adventure lover should explore.
Back in 2020, we were able to road trip the Utah Mighty Five and it was an amazing experience. We recommend starting at Zion National Park, and working your way through Bryce Canyon, Capitol Reef, Canyonlands, and then ending your road trip at Arches National Park in Moab.
Each park has its own set of unique views, hikes, and adventures that are all located in Southern Utah. Going on a road trip to visit all five National Parks is very appealing to many as each of them are between 30 mins to 2.5 hours away from one another.
During our visit, we were able to hit all the popular hikes and viewpoints including some hidden gem locations. Here we’ll walk you through the best parts of each Utah National Park and where you should spend your time while visiting the Mighty Five.
Utah Mighty Five

Best Tips for Exploring the Mighty Five
Time Needed for a Utah National Parks Road Trip
It may seem like a big commitment, but to explore all 5 Utah National Parks, we’d recommend at least 1 week minimum. If you really want to see all the highlights without rushing, 2 weeks is ideal! We’d recommend doing this road trip in the fall, winter, or spring as it gets incredibly hot in the Utah National Parks in the summer time.
Invest in a National Parks Pass for the Mighty Five
Getting a National Parks Pass will be essential to this trip and will save you money, so you don’t have to pay to enter each park. It costs $80 USD and will get you into all USA National Parks for a whole year. Whereas some national parks have $30 to $35 entry fees, getting the America The Beautiful Pass will save you a ton of money if you’re planning on visiting more than 3 national parks in a year. If you are a veteran, you do get this pass for free with proper documentation.
If you’re not keen on getting a parks pass, you can visit the national parks on one of the five free days throughout the year to save money on one of the days of your road trip.
Break in Some Quality Hiking Shoes
You’ll also want to bring quality hiking shoes as you’ll be out on the trails a lot this trip. If you want to know what hiking shoes are best, check out our blog about the Best Hiking Shoes for Outdoor Adventures.
Permits & Reservations
Due to popular demand and over tourism concerns, some of the Utah Mighty Five parks may have caps on visitation during your intended trip. Make sure to check out the NPS website for each park before heading out on your road trip to see if you need special entry reservations.
Typically, reservations are released up to 6 months in advance for campsites. For day use permits, it can range anywhere from 1 day, 2 weeks, or months before so it’s important to check while planning your road trip.
Zion National Park
Zion National Park is a great place to start your Utah Mighty Five trip. The park is sometimes referred to as a “climber’s paradise” due to the 2,000 ft sandstone cliffs all around. Every inch of this park is breathtaking.
Things to know before you go to Zion National Park:
- If you’re wanting to hit all the major spots, we recommend staying here for about 2-3 days.
- If you have a bike or can rent one, we recommend bringing it to the park. The shuttle lines can get up to an hour long at the visitor center and the bike will help you get around the park faster.
- Bring a cooler or fridge of some sort otherwise you’ll have to exit the park and go into Springdale to get ice multiple times.
- Bring a shower kit to rinse off. If you’re doing the Narrows hike, you’ll want to wash off immediately after due to the bacteria in the water. We recommend purchasing the Rinse Kit, or you can drive to Springdale and use a shower there.
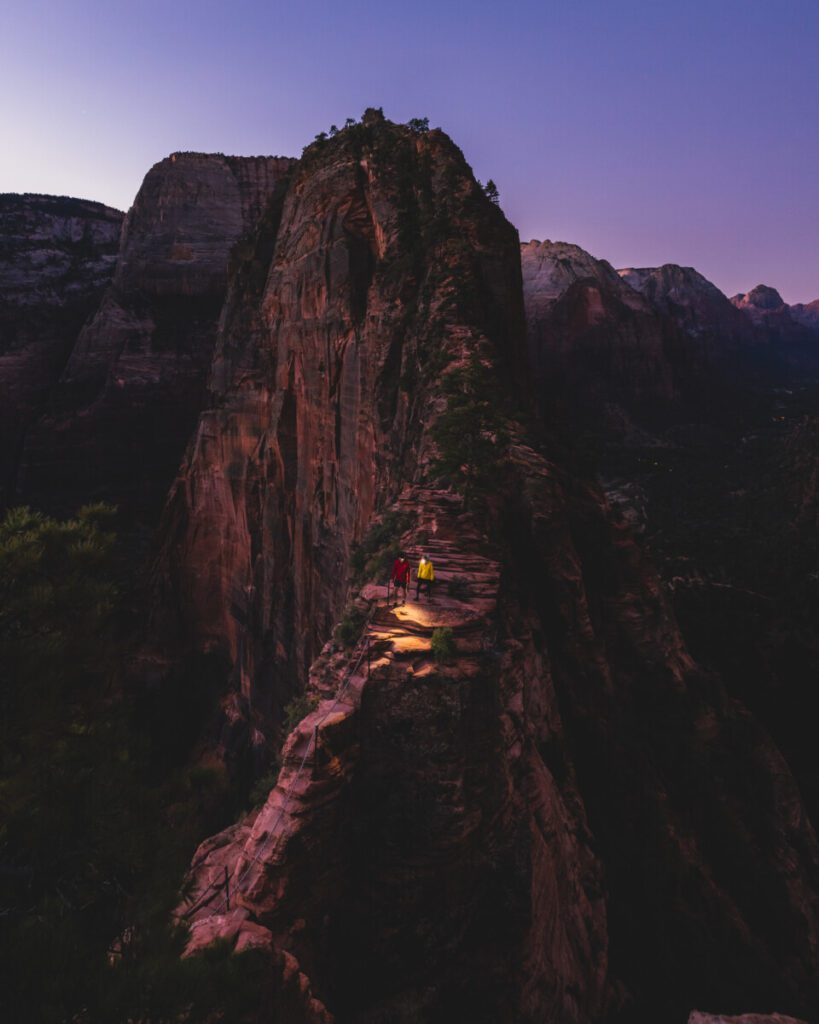
Angels Landing
This hike is known to be the scariest hike in the whole country. Although we personally don’t find it that intimidating, it’s definitely not for those who are afraid of heights. It’s about 4.4 miles total and 1,604 ft in elevation gain.
When we came to Angel’s Landing in 2020 the trail was open for everyone, but now this hike does require a permit. So, make sure you have one before coming to the park. If you aren’t able to get one, we recommend hiking to Scout’s Landing at least and enjoying the views from there.
If you bring a bike to the park, we suggest riding it to the trailhead for sunrise. The shuttles start at 6 am, but if you arrive at the trailhead at 5 am, you’ll beat the crowds and be some of the first people at the top. This hike does get extremely crowded so getting there early is essential. You’ll definitely want to bring a headlamp and some layers as the top is very windy and maybe even some gloves for holding the cold chains as you hike up and down.
This is a must-do hike for all adventure lovers visiting the Utah mighty five that aren’t too afraid of heights.
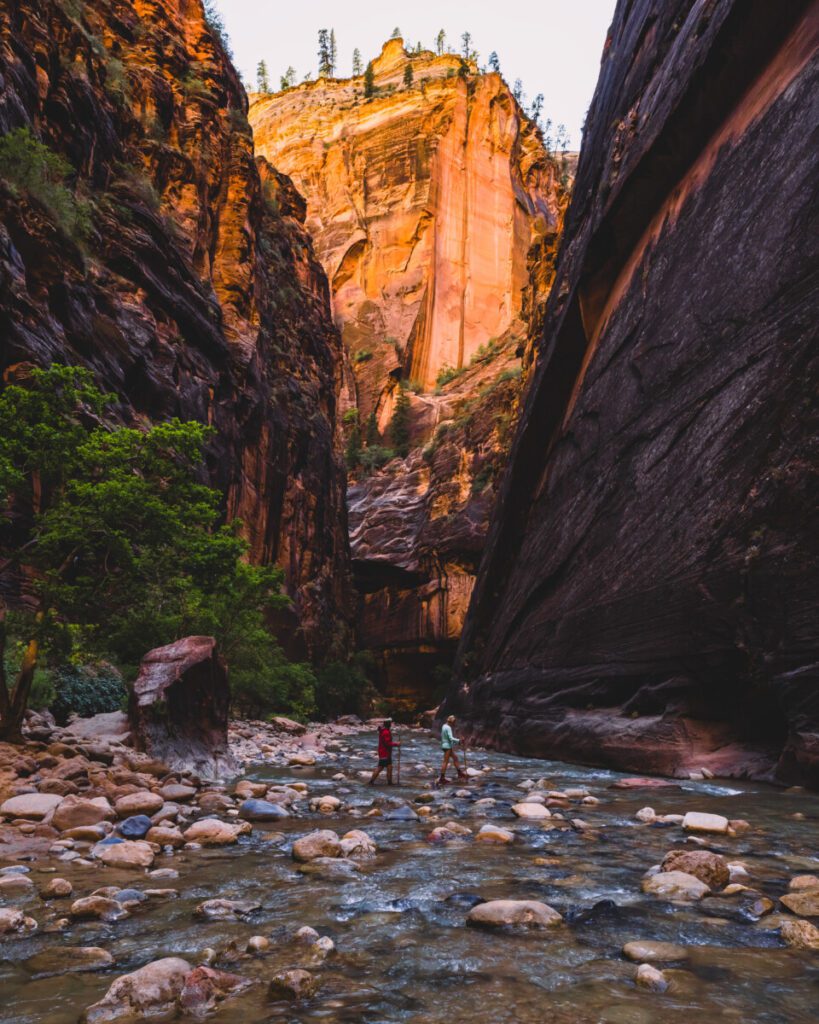
The Narrows
The Narrows is a very unique hike and another must-do in Zion. Before you start this hike, we recommend visiting Zion Outfitters and renting some neoprene socks and boots and sticks. If you’re planning to visit in the winter months, you should rent the pants as well.
Most of this hike is in the water so having the proper shoes is vital to enjoying your experience. Once you get off the shuttle you’ll need to hike about a mile to the trailhead and that’s where you can start putting your rental gear on. The best time to hike this trail is between 12-4pm when the sun is inside The Narrows. This is another very popular hike so keep in mind that there will be lots of people the whole time.
You can hike after 4pm and you might even have The Narrows to yourself but be aware that it might be a little chillier as the sun won’t be coming in through the canyons.
Our favorite part of the hike was Wall Street and Orderville Canyon. Once you get to the junction, if you make a right, you’ll be headed straight to it. You can only go about ¼ mile past the junction, but it’s very peaceful and stunning in the canyon there.
Lastly, we recommend bringing extra shoes such as flip flops or comfy sneakers to put on after the hike. The rental boots aren’t the most comfortable and your feet will thank you once you take them off.
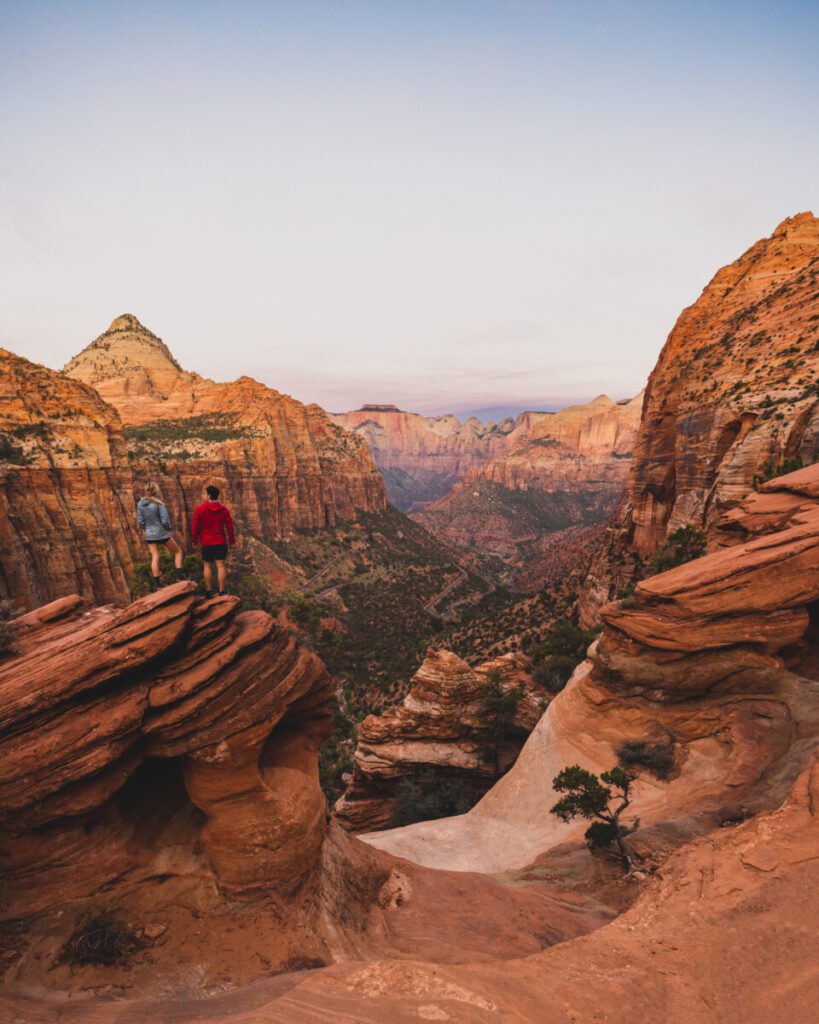
Canyon Overlook Trail
We came to Canyon Overlook for sunrise and it was stunning. It’s about a mile round trip and it does get pretty crowded so try and get there early if you can. We heard this location is more of a sunset spot than sunrise, but we don’t think you can go wrong either way. Whatever your schedule allows on your trip, we definitely recommend checking this spot out for sunrise or sunset.
For our full guide to visiting Zion National Park, click here.
Bryce Canyon National Park
Next up on the Utah mighty five road trip is Bryce Canyon National Park, which is just a little over two hours from Zion. Here you’ll see majestic red rock formations and pinnacles referred to as “hoodoos”.
We visited here in the month of September, and it was around 75 degrees in the mornings and 80-90s during the days. If you plan on visiting around the same time, be sure to pack lots of water and sunscreen as a lot of the hikes are exposed.
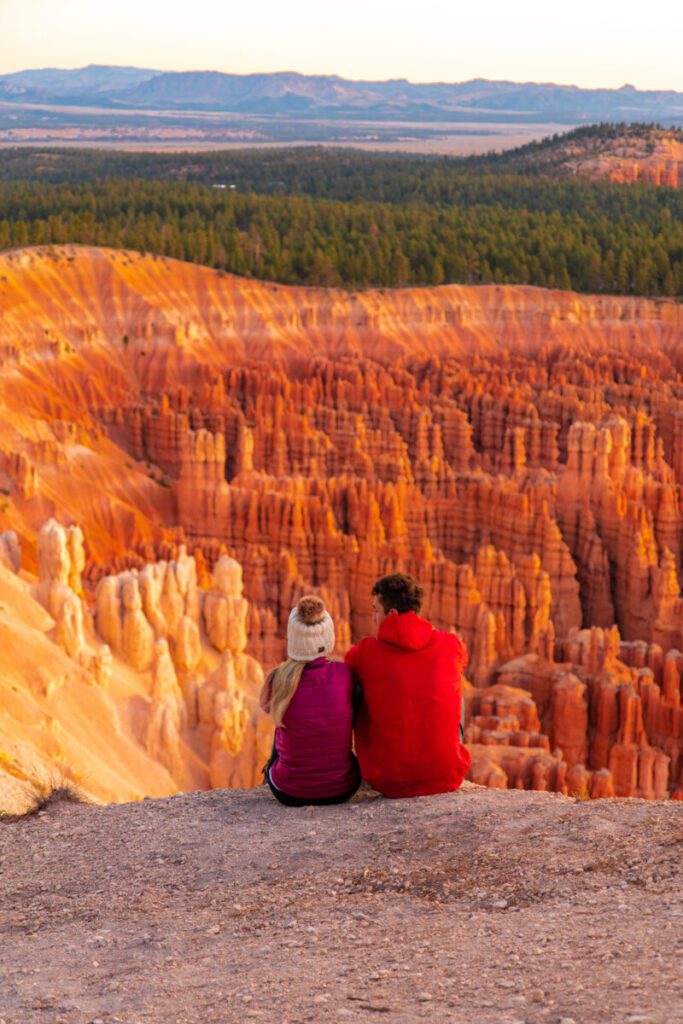
Inspiration Point
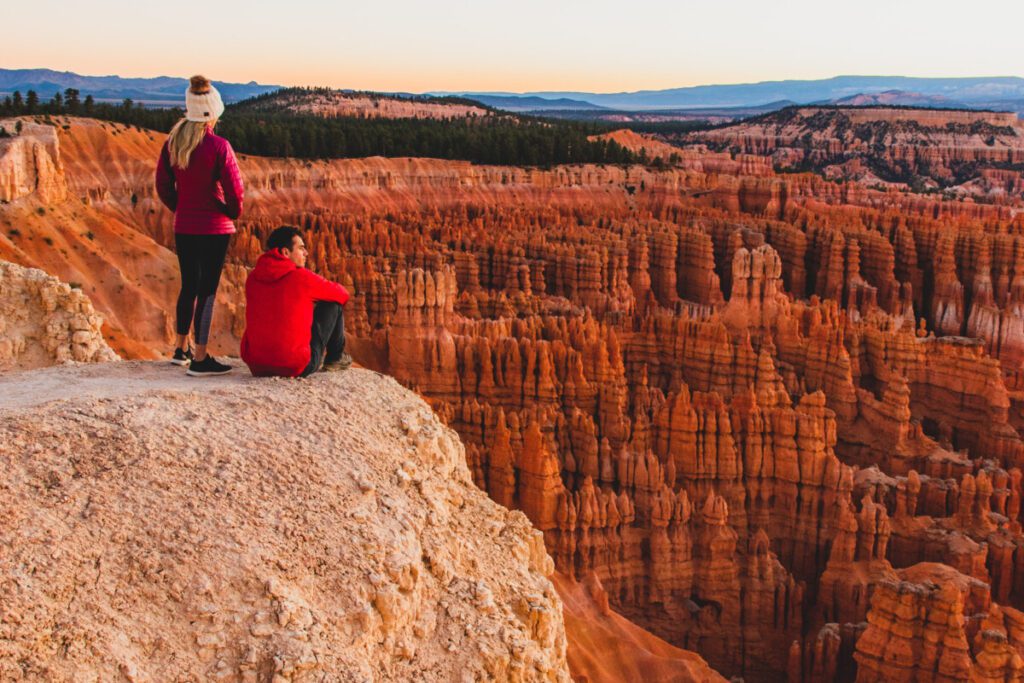
This is the most beautiful spot to watch the sunrise in the park. There are viewpoints from the Upper, Middle, and Lower Inspiration Point and it’s about 0.6 miles out and back. Watching the sun rise up and cover the hoodoos is something we recommend everyone to witness.
Sunset Point
Next, we suggest taking the Rim Trail from Inspiration Point and hiking the ½ mile to Sunset Point. It’s called Sunset Point, but we personally love coming here for sunrise instead. The sun sets in the west and doesn’t light up the hoodoos as well as the sunrise does, which is our favorite part. The hike along the Rim Trail does have unstable soil so make sure to be extra careful when getting close to the cliffs.
Navajo Loop Trail
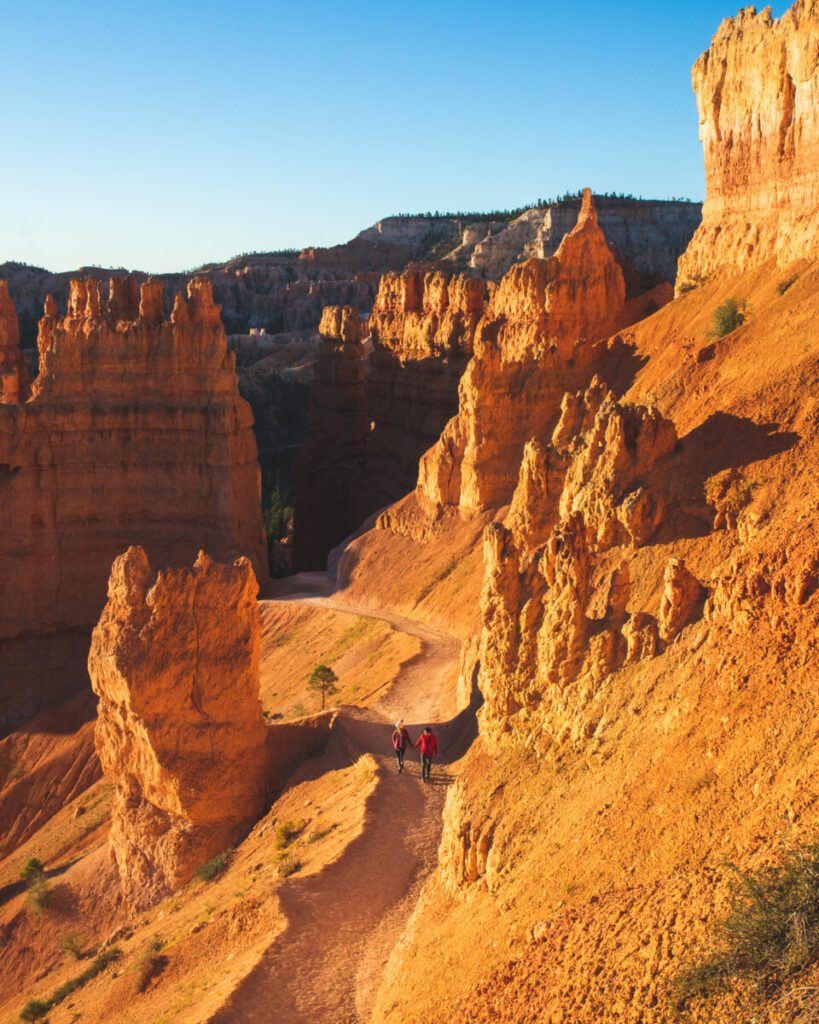
Navajo Loop is about 1.3 miles round trip and takes you to see some stunning rock formations. We recommend hiking it clockwise to avoid the sun being in your eyes when you’re coming uphill. As you hike, you’ll first see Thor’s Hammer which is a super awesome narrow hoodoo that resembles Mjolnir. At the end of the trail, you’ll see an area called Wall Street, which was our personal favorite of the hike. The hoodoos here are incredibly tall and the canyons are super fun to walk through.
Capitol Reef National Park
This is the least visited national park of the Utah mighty five. With that said, there are still 243,921 acres of beauty in this park. We only spent about half a day here, but we think you can see most of the major spots within 1-2 days.
Chimney Rock
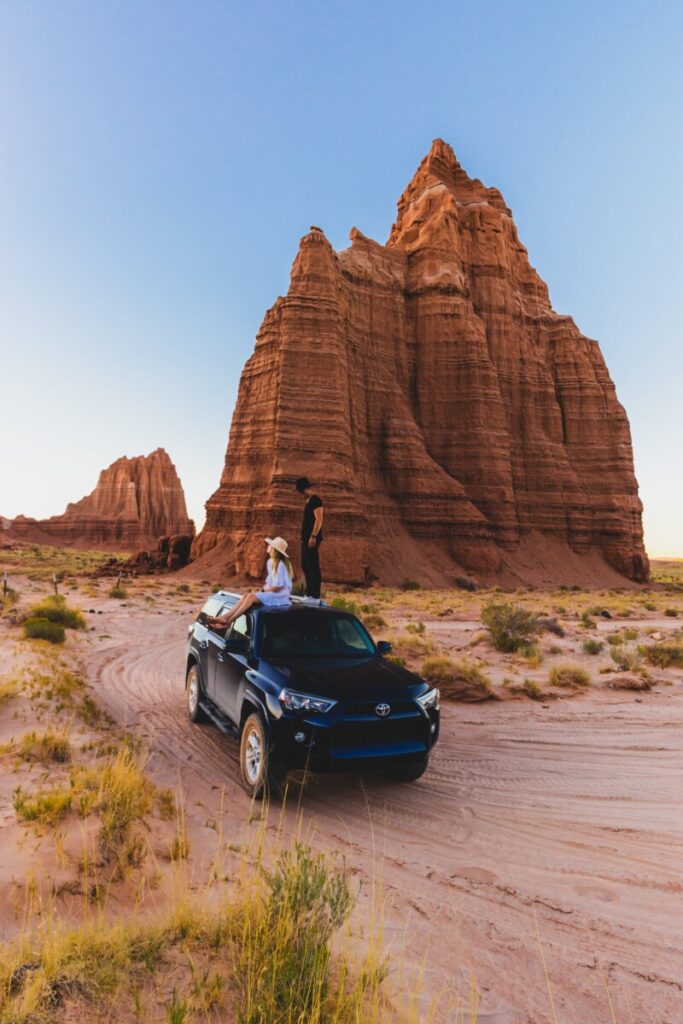
One of the first attractions you see when entering the park is Chimney Rock. We didn’t stop and hike around, but the red rock formations were absolutely stunning to see. If you have time to stop here, there is a Chimney Rock Loop Trail that is about 3.3 miles round trip and takes you up almost 800 ft in elevation.
Hickman Bridge
Another spot we drove past was Hickman Bridge. This area also has beautiful rock formations, arches to walk around, and many educational signs to learn about the area. The trail itself is about 1.7 miles out and back and is great for families and children.
Cathedral Valley
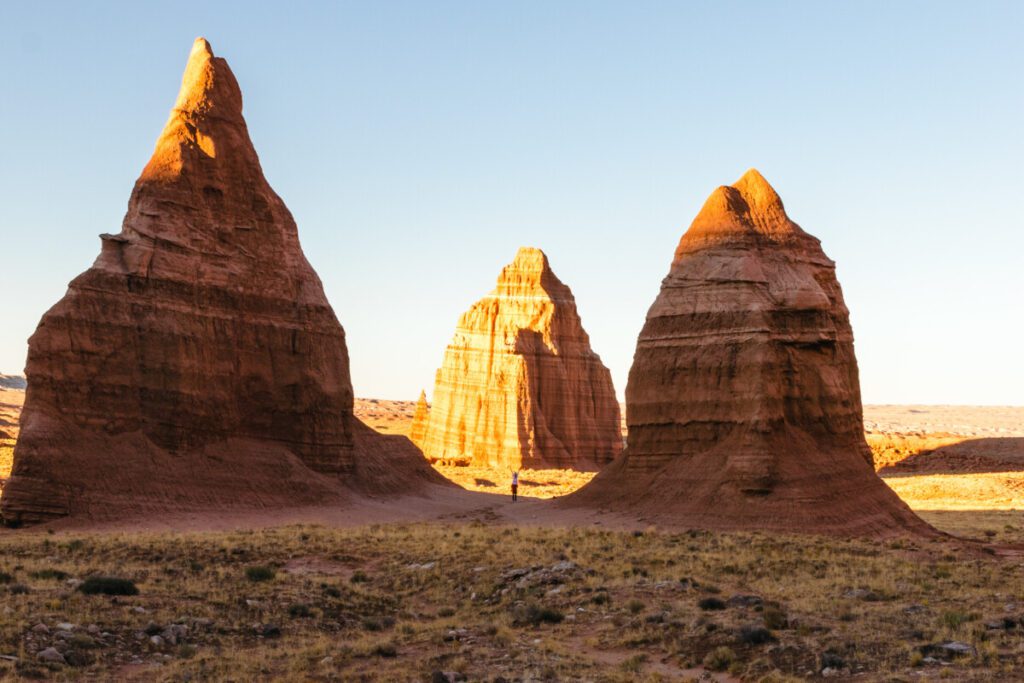
Cathedral Valley is where we spent most of our time while in Capitol Reef National Park. If you have an off roading vehicle we highly recommend driving along this road. The full loop is about 58 miles and takes around 3-4 hours to complete. We personally opted to only drive 17 miles of it due to our schedule, but we got to explore the Temple of the Sun and Moon. The views of the valley and temples were stunning and were our favorite parts of the park.
We found out that you can actually camp out there on the BLM land just as long as you aren’t near the Sun and Moon Temples. We spent a few hours here and saw nobody else the whole time. Because this area is so secluded, be sure to be prepared if something goes wrong. We suggest bringing a map, making sure you have enough gas, an extra tire, food and water in case you get stuck for a couple days. You’ll most likely be fine, but it’s always best to be safe and prepared for anything when out in the wilderness.
Canyonlands National Park
Next up on your Utah mighty five road trip is Canyonlands National Park. Alongside the other four parks, this is an International Dark Sky Park. The sky at night is breathtaking with how many stars you are able to see. We highly recommend taking your camera out to capture the beauty.
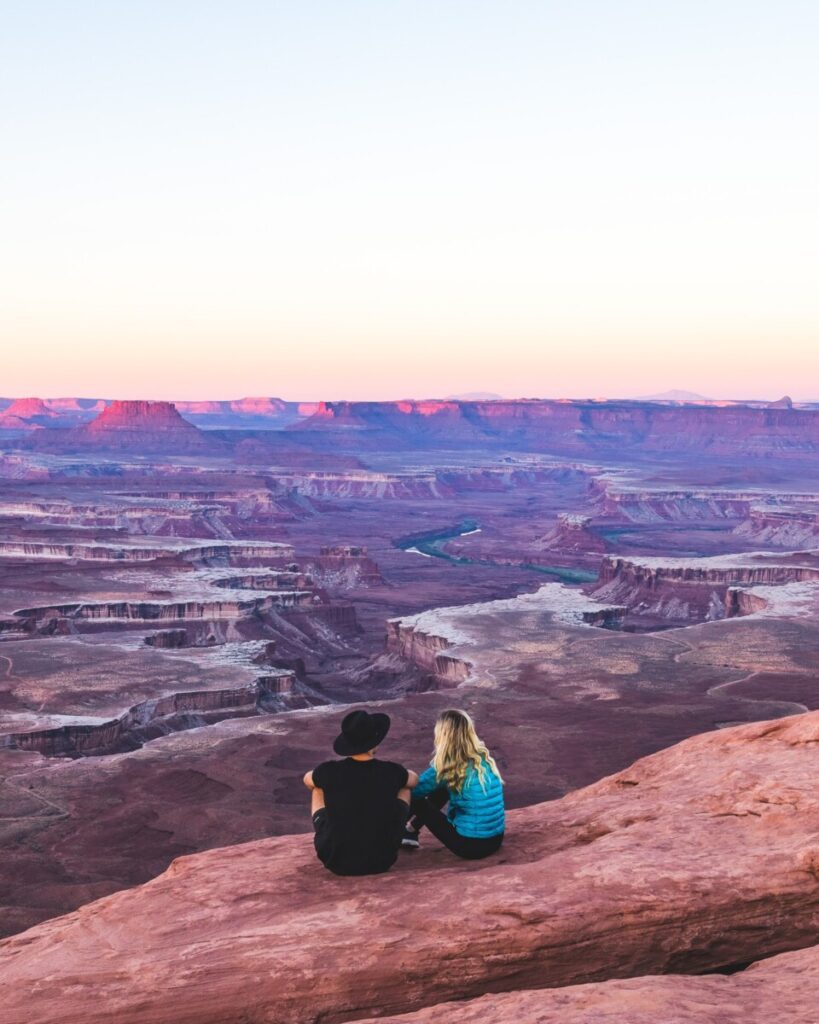
Green River Overlook
We came here for sunrise on our first day because the Mesa Arch was incredibly packed. We heard this location is more of a sunset spot, but if you come for sunrise, you’ll have the place to yourself. It’s definitely more of a blue hour spot but seeing the gorgeous red glow over the canyon was amazing. We recommend coming here if you’re looking for a peaceful and relaxing area to watch the sun come up.
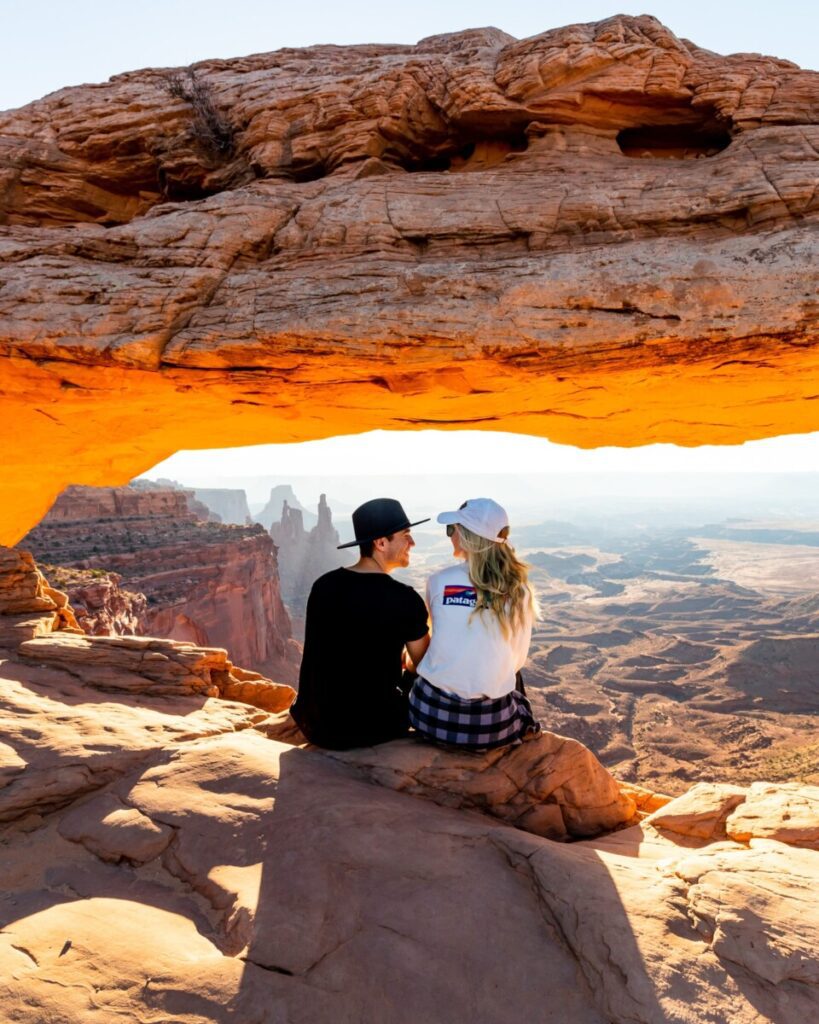
Mesa Arch
After we watched the sunrise at Green River Overlook, we made our way to Mesa Arch. This spot is extremely popular in the park and if you choose to come for sunrise be aware that there will be around 200 cars following you to the parking lot.
The trail itself is about 0.7 miles round trip and is heavily marked by cairns and signs. There are additional signs that ask you to keep off the arches so please remember to be respectful of the land so everyone can continue to enjoy it.
We recommend visiting this arch after sunrise. We came at around 8 am and the majority of the crowds had left. You can still get some great lighting if you’re looking to do some photography while there.
Grand View Point Overlook
This spot is a super easy walk at 0.1 miles total. It gives you a stunning view of the canyons and is known to be a wonderful spot to watch the sunset in the park.
Shafer Trail
If you’re doing the Utah mighty five road trip, we highly recommend driving along the Shafer Trail. It goes from the 141 and cuts over to Moab and takes about 2 hours to drive. The views are gorgeous, but you’ll absolutely need an off roading vehicle. The drive is mainly switchbacks with lots of exposure and can be scary for anyone afraid of heights or not used to driving off road trails.
If you don’t have a 4×4 vehicle or don’t want to personally drive the switchbacks, you can always look at booking a tour. While we were there the road was mainly tour guides taking people through the canyons. It can be a fun excursion for you and your group while visiting Canyonlands.
Arches National Park
Just 30 minutes from Canyonlands is Arches National Park. Of the Utah mighty five, this was our personal favorite to explore. As you drive in, you’re able to already see about 10 different arches. The monuments, rock structures and geology are unreal in this park, and we were absolutely mind blown by the unique beauty it had to offer.
Park Avenue Monolith
One of the first stops you can make in Arches National Park is at the Park Avenue Trail. This is about a 1.8 mile hike and takes you to see huge monoliths. They call this area Park Avenue because it resembles New York and all the skyscrapers.
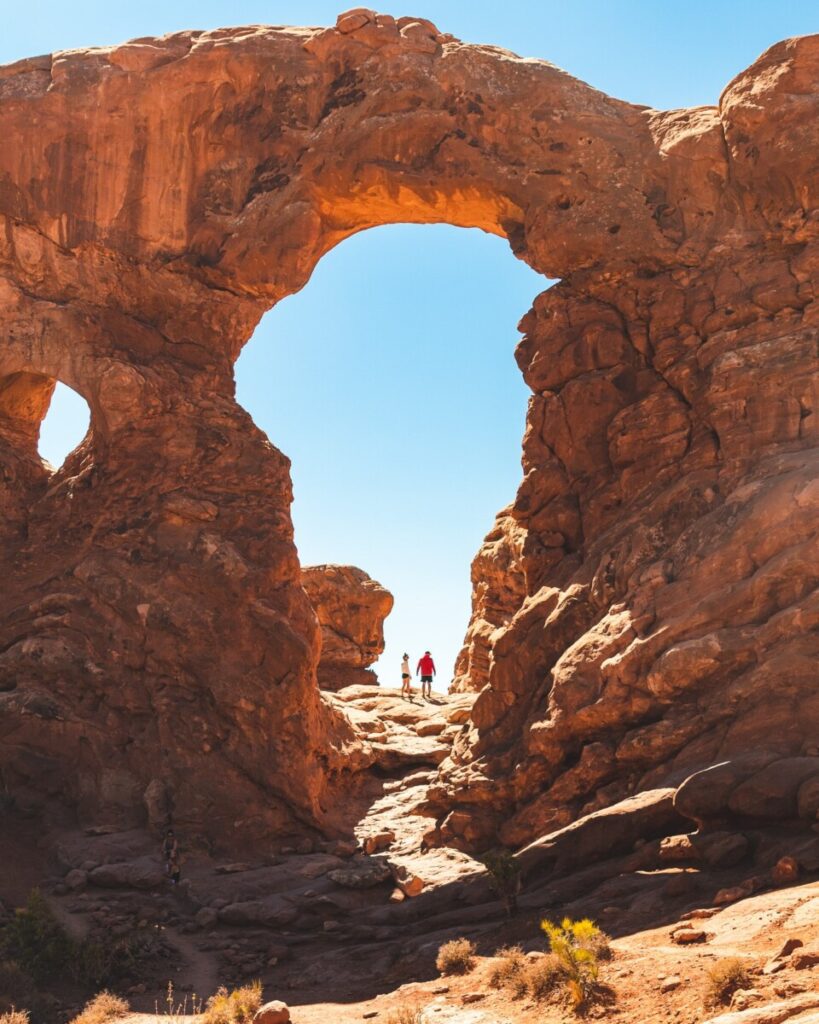
Windows Loop
Next up is the Windows Loop Trail. It’s about a mile and one of the easiest hikes. You’ll get to see three different arches which are the North Window Arch, South Window Arch, and the Turret Arch. The Turret Arch was our personal favorite and happened to also be the least crowded of the three.
We recommend visiting here later in the day because if you go before noon all the rocks will be in the shadows and you won’t be able to see the red color in the arches as well.
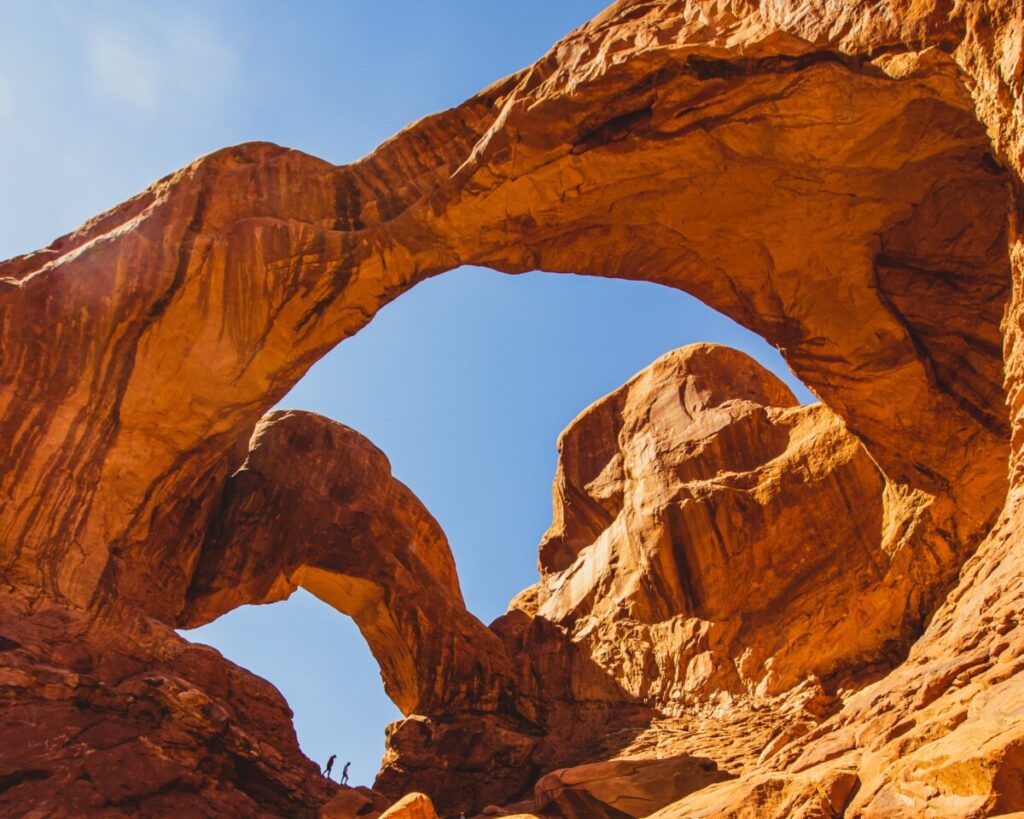
Double Arch
If you’re already at Turret Arch, you can walk the path from the bathrooms on the Windows Loop Trail and take it down to the trailhead for Double Arch. It’s about half a mile from there and is the tallest arch in the park. We suggest coming here later in the day as well like around sunset or a couple hours before. If you do, you’ll be able to capture a really cool sun flare through the arches.
Drive By Attractions
There is so much to see in this park and if you’re tight on time like we were, here are some locations we think everyone should at least drive past to see.
- Balanced Rock
- Three Gossips
- Tower of Babel
- Courthouse Towers Viewpoint
Delicate Arch
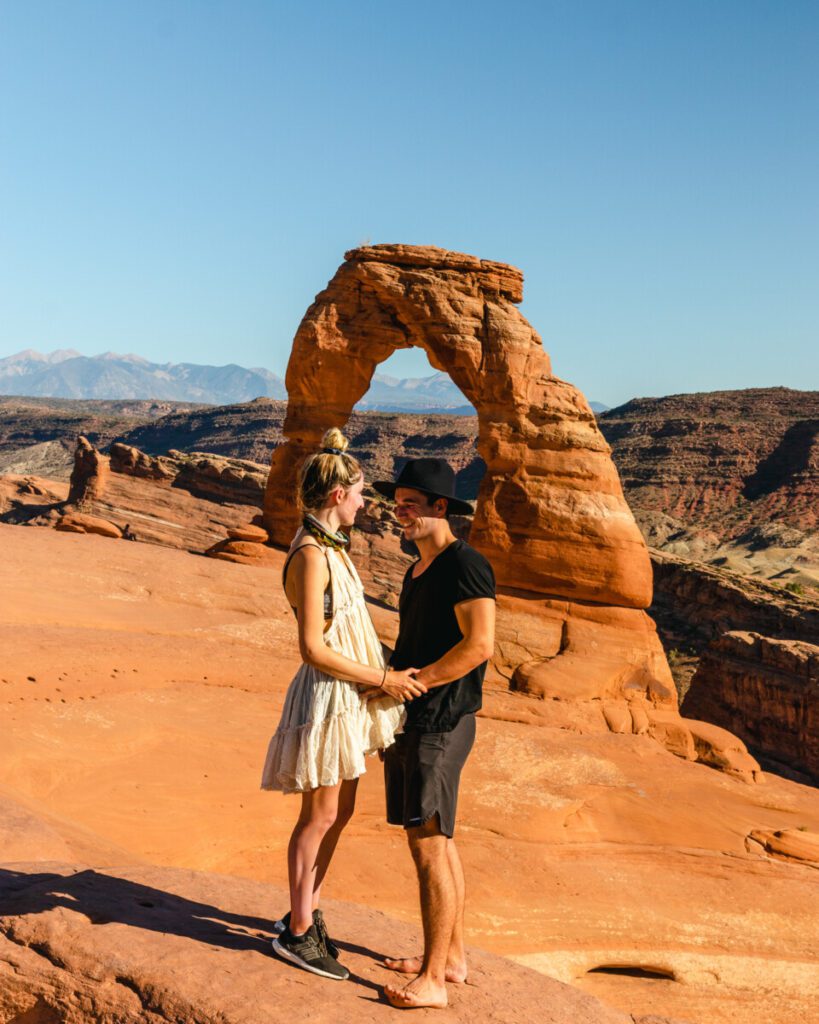
This is the most popular arch in Arches National Park. It’s a 3 mile loop that has a lot of uphill and can be pretty challenging. If you don’t want to hike it there is a drive-up spot where you can see it from afar, but obviously nothing compares to seeing it up close.
The trail itself can get a little confusing as you’re hiking up slabs of rock and are entirely exposed. Make sure to bring tons of water and snacks and sunscreen. It was about 105 degrees when we came, which made the hike even more challenging.
The most popular time to visit is for sunset, but if you want to beat the crowds we suggest going for sunrise. We went at around 5 pm and had the place to ourselves, but that could have definitely been due to the heat.
Time to Explore The Mighty Five
No matter how much time you have to devote to this trip, exploring the Utah mighty five is an experience you’ll never forget. We highly recommend this adventure to anyone who loves the outdoors and exploring new places. There’s truly nothing like Utah National Parks. Let us know what your favorite spots are in the Utah mighty five.
You may also enjoy:
